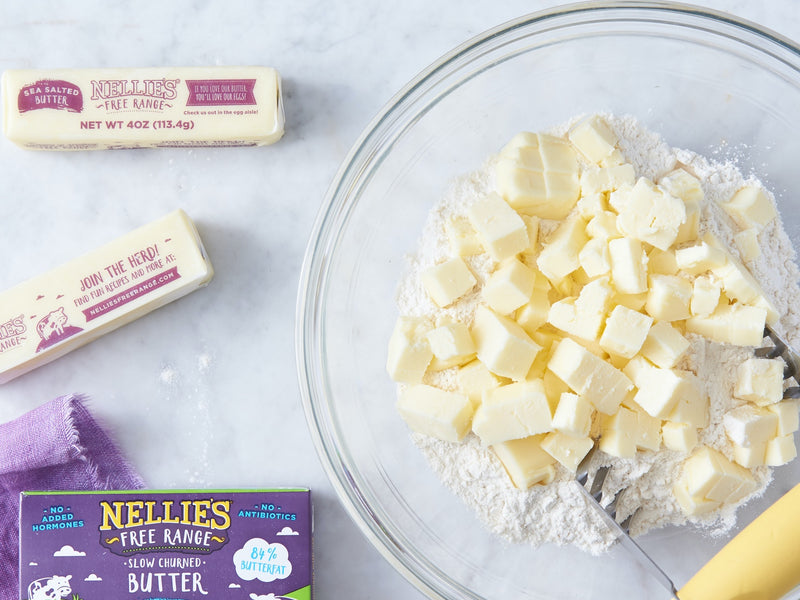
The easiest methods to cut in butter!
If you've ever wondered how to cut butter into flour for an apple crumble topping, a flaky pie crust, layered biscuits, or tender blueberry scones, good news: there are countless ways to do it!
What does it mean to cut in butter?
Cutting in butter means working large chunks of butter into dry ingredients (usually flour) in order to break the butter down into smaller pieces that are each fully coated in those dry ingredients.
Why do I need to cut in my butter?
When the small butter pieces in your pastry start to warm in the hot oven, the small amount of water in the butter turns into steam. That steam then tries to escape, creating a tiny air pocket that the butter itself melts into. The result? Those flaky, tender layers (and not to mention that rich and buttery flavor!) you know and love that are found in pie crusts, biscuits, scones, and other pastries.

1. Use a food processor
A food processor is the quickest and easiest way to cut in butter. The only thing that can go wrong is overprocessing, which can happen in seconds. And when it does, the butter pieces become too small and overworked, resulting in a pastry that isn't flaky, but closer to a buttery cookie dough. As long as you're conservative with the pulse button, using a food processor is a foolproof way to cut in butter.
- Place all dry ingredients in your food processor's bowl, measured according to your recipe.
- Cut butter into 8 equal pats using the tablespoon markings on the butter wrapper.
- Add butter pieces according to amount specified in recipe to the food processor and toss lightly to coat in dry ingredients.
- Using the pulse button only, pulse mixture briefly 8 times to incorporate the butter into the dry ingredients. On pulse 4, if all the butter is still sitting atop the flour, gently toss the mixture to evenly distribute.
- Continue to pulse a few more times, checking between each pulse for any remaining large chunks of butter, until you reach the desired size listed in your recipe (i.e. "pea-sized pieces"). If you're worried about overmixing, simply incorporate any remaining large pieces by hand, smearing the butter between your fingers until the desired size is reached.
- If the butter looks or feels like it's softening too much at any point, place the whole food processor bowl in the fridge for 15 minutes to chill, then continue.

2. Use a pastry cutter
A pastry cutter is a tool made specifically for cutting in butter, and can be a great starting point for new bakers who don't have a food processer or worry about overprocessing their mixture. Pastry cutters are U-shaped with a handle across the top and 4-5 thin blades at the bottom that do the actual cutting of the butter. Unlike the food processor, pastry cutters let you target the biggest pieces of butter in your bowl while ensuring that the butter temperature doesn't increase too much in the process.
- Cut butter into 8 equal pats using the tablespoon markings on the butter wrapper.
- Add butter pieces to a bowl of dry ingredients, measured according to your recipe.
- Toss butter pats in dry ingredients, distributing them evenly throughout the bowl and fully coating each piece of butter.
- Using the pastry cutter and a "mashing" motion, begin to cut the butter pieces up in the flour. Continue until butter pieces are the desired size listed in your recipe (i.e. "pea-sized pieces"). You may need to clean out your pastry cutter with your fingers from time to time or toss the butter in the flour as you work to keep recoating it so that the pieces don't stick back together.
- If the butter looks or feels like it's softening too much at any point, place the whole bowl in the fridge for 15 minutes to chill, then continue.
3. Use your hands
Most experienced bakers who have a pretty good handle on their technique like to cut in butter with their hands. While there are many benefits to gadgets and tools like a food processor or pastry cutter, using your own two hands gives you the most control over your butter pieces. It's also great way to tell exactly how your mixture feels at different stages of the process. There's one downside to this method, though: the heat in your fingertips will warm your butter pieces fairly quickly, so it's essential that you start with very cold butter.
- Cut your stick in half the long way twice—once through the top, and again through the side, keeping the stick intact instead of separating the pieces. Cut the butter at each tablespoon mark, resulting in each tablespoon now containing 4 cubes.
- If new to this technique, spread butter cubes on a plate and place in the freezer for 15 minutes to chill, then continue. This will give you a little more time to work with the butter before it gets too warm.
- Add butter pieces to a bowl of your measured dry ingredients.
- Toss butter in the flour to distribute it evenly throughout the bowl to completely coat each individual piece.
- Start smearing the butter into the flour between your thumb, index, and forefinger, creating sheets of butter. Continue to work the butter into smaller and smaller pieces until you reach the desired size as listed in your recipe (ex. "pea-sized pieces").
- If the butter looks or feels like it's softening too much at any point, place the whole bowl in the fridge for 15 minutes to chill, then continue.
Tips and tricks for cutting butter into flour
- Start with cold butter. For flaky pastries, your butter has to be in the form of small, individual pieces when your dough hits the oven. If the butter gets to warm, it will incorporate fully into your dough, which could turn your pie crust into a buttery tart dough (still delicious, but not exactly what you were going for).
- The size of the butter chunks you start with matters. For the food processor or pastry cutter method, start with tablespoon-sized chunks. When using your hands to cut in butter, start with 1/2" cubes.
- Read the recipe. Most recipes will specify what size your butter pieces should be when you've finished cutting them into your dry ingredients; common sizes include quarter-sized, dime-sized, and pea-sized. The texture of your final product can vary significantly based on the size of the butter pieces in your finished dough.


