Shine your light in style!
Two of our very favorite things are being combined for this colorful activity today: crafting with recyclable materials and making lanterns! There's nothing more fun than making upcycled geometric lanterns to hang outside under the stars or over your bed. They bring a pop of color and whimsy to any space.
If you're like us, you're probably in a constant state of daydreaming about summer barbecues and pool parties. Or maybe you prefer the festive sights and smells of wintertime. No matter the season, we love these customizable lanterns for both inside and outside, during both the day and night. We chose shades of pink, but you can pick whichever colors best suit your occasion (think silver and gold for New Year's Eve or red, white, and blue for Independence Day). You can even add small battery-operated flashlights inside to illuminate them for nighttime parties!
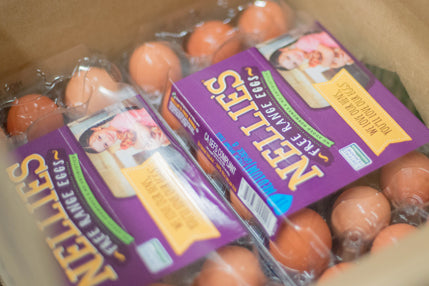
So why make your own? There's more to Nellie's egg cartons than meets the eye. They're made from 100% post-consumer recycled plastic and are kinder to the environment than most other types that you see in the egg aisle, including paper pulp! Their sturdiness helps keep these lanterns strong so that you can use them again and again.

Supplies
- Empty Nellie's Free Range cartons
- Scissors
- Non toxic acrylic paint
- Paintbrush
- String
- Pom pom trim (or other decorative trim)
- Clear tape
- Hot glue gun
How to make the lanterns

-
Begin by cutting the flat lid segment off of the egg carton and recycle or save for another craft. Leave the remaining two segments attached at the hinge and apply acrylic paint onto the inside of the carton. Make sure to use an acrylic paint that adheres to plastic and let dry completely, applying as many coats as needed until covered.
-
Repeat this on as many egg cartons as needed. For a four-sided lantern, you'll need two hinged pieces. For the larger five-sided lantern shown, we added one extra panel.
-
You can also choose to customize the size of the lantern by trimming egg compartments off before painting (you can use the extras to make floral garlands!). Mix and match sizes of lanterns as desired.

-
Once the paint is completely dry, lay out the segments side by side on your work surface. Use clear tape (packing tape works well here) to attach the neighboring cartons together to form an almost invisible hinge that can only be seen on the inside of the lantern. Use scissors to snip the tape as needed and press onto the egg carton to make sure the hinge is securely attached.
-
Once all the cartons are attached side by side, connect the two ends together, forming a tube. Again apply the tape to form the last hinge on the inside of the lantern.

- Cut two pieces of string of equal length, about 10 inches long. Tape one end of the first string into the inside of the top edge of the lantern, right in the hinge. Tape the other end of that same string into the hinge directly opposite the first. Repeat this with the second piece of string, taping to the opposite hinges, so that the lantern now has two loops along the top that cross. Cut a third piece of string (as long as needed to hang your lantern) and tie a loop in one end around where the other two strings cross. This will allow the lantern to hang completely evenly without fussy tying and retying of knots.

- Finally, with your hot glue gun on the low-heat setting, apply a line of glue along the bottom edge of the lantern. Press the trim into the glue to secure, covering the entire bottom edge. Add additional trim or tassels if desired, then hang and enjoy!

Happy crafting!


